> ## Documentation Index
> Fetch the complete documentation index at: https://ampersand-24eb5c1a-feat-always-enabled-object.mintlify.site/llms.txt
> Use this file to discover all available pages before exploring further.
# Linear
## What's supported
### Supported actions
This connector supports:
* [Proxy Actions](/proxy-actions), using the base URL `https://api.linear.app/graphql`.
### Example integration
To define an integration for Linear, create a manifest file that looks like this:
```YAML
# amp.yaml
specVersion: 1.0.0
integrations:
- name: proxyLinear
displayName: Linear Proxy
provider: linear
proxy:
enabled: true
```
## Before you get started
To connect Linear with Ampersand, you need [a Linear Account](https://linear.app/signup).
Once your account is created, you'll need to create an app in Linear and obtain the following credentials from your app:
* Client ID
* Client Secret
You will then use these credentials to connect your application to Ampersand.
### Creating a Linear App
Follow the steps below to create a Linear app.
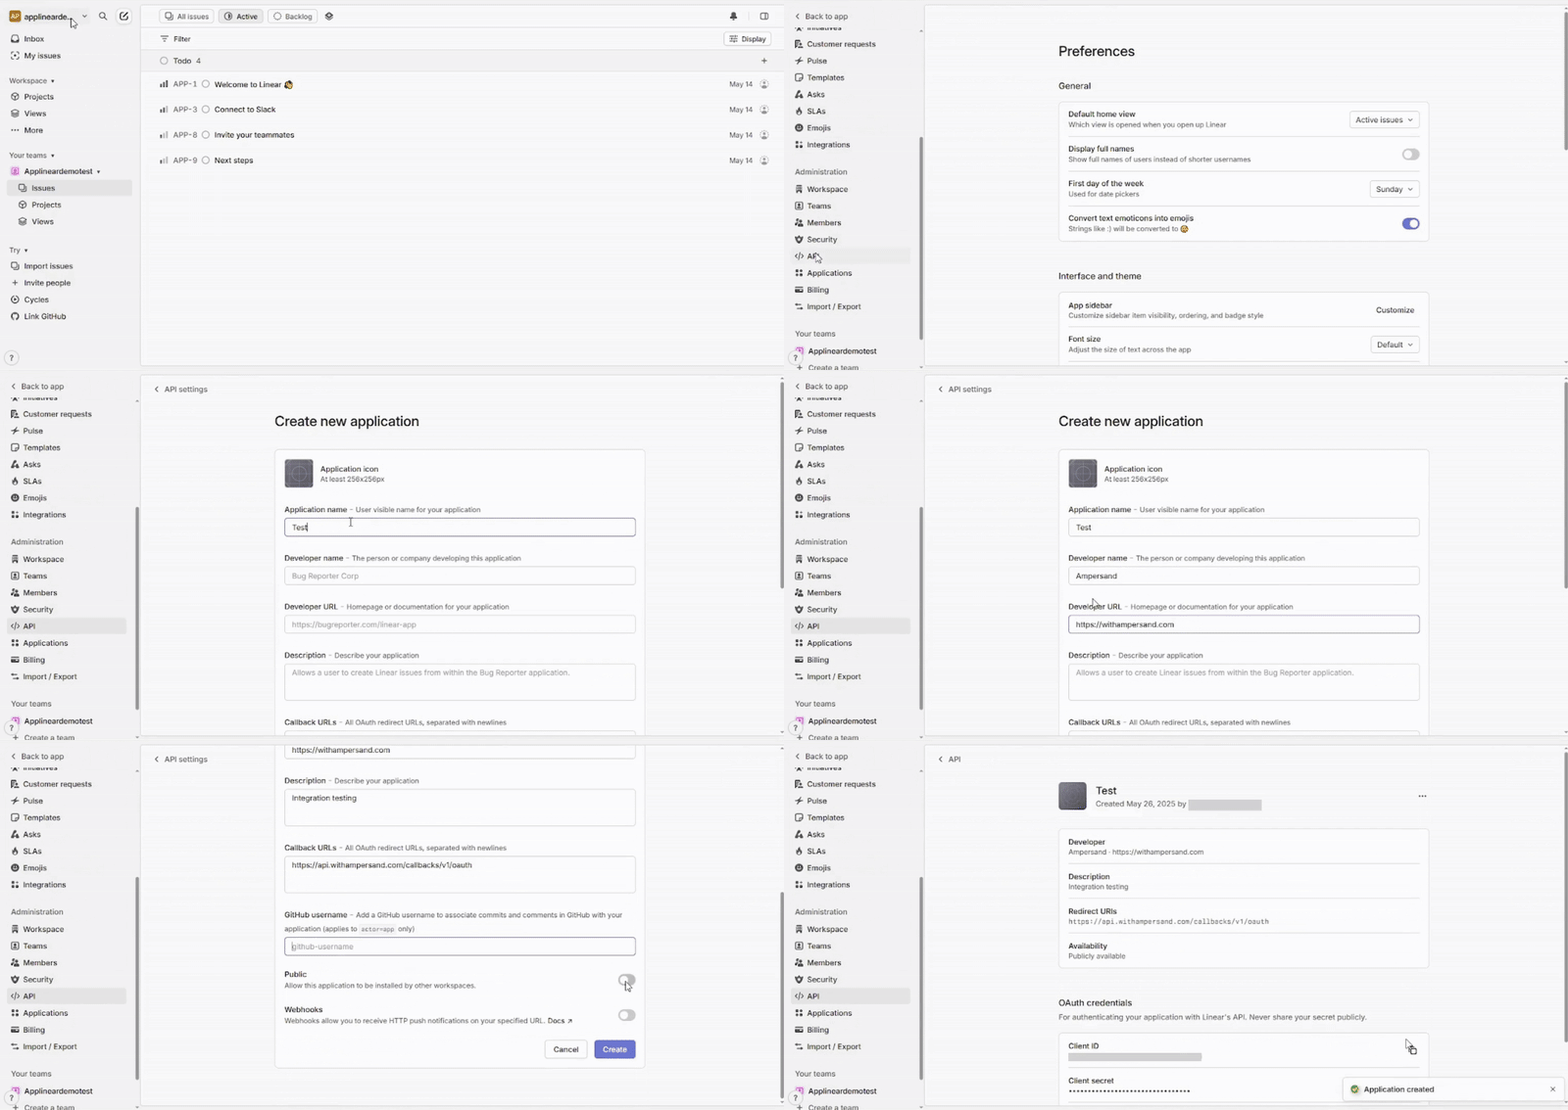
1. Log in to your [Linear](https://linear.app/login) account.
2. Once logged in, Click the dropdown next to your **workspace name** in the top-left corner, then select **Settings** from the menu.
3. Navigate to **API** menu under **Administration** section.
4. Click **New OAuth Application**.
5. Upload an **icon** for the application with a minimum resolution of 256x256 pixels.
6. Enter the Application name, Developer name, Developer URL and Description in the respective sections.
7. Enter the Ampersand Callback URLs: `https://api.withampersand.com/callbacks/v1/oauth` in the **Callback URLs** section.
8. Enter the github username in the **GitHub username** section.
9. Enable the **Public** option which leads to allow a application to be installed by other workspaces.
10. Enable the **Webhooks** option to receive HTTP push notifications on a specified URL and then click **Create** button.
 ## Add Your Linear App Info to Ampersand
1. Log in to your [Ampersand Dashboard](https://dashboard.withampersand.com).
2. Select the project where you want to create a Linear integration.
## Add Your Linear App Info to Ampersand
1. Log in to your [Ampersand Dashboard](https://dashboard.withampersand.com).
2. Select the project where you want to create a Linear integration.
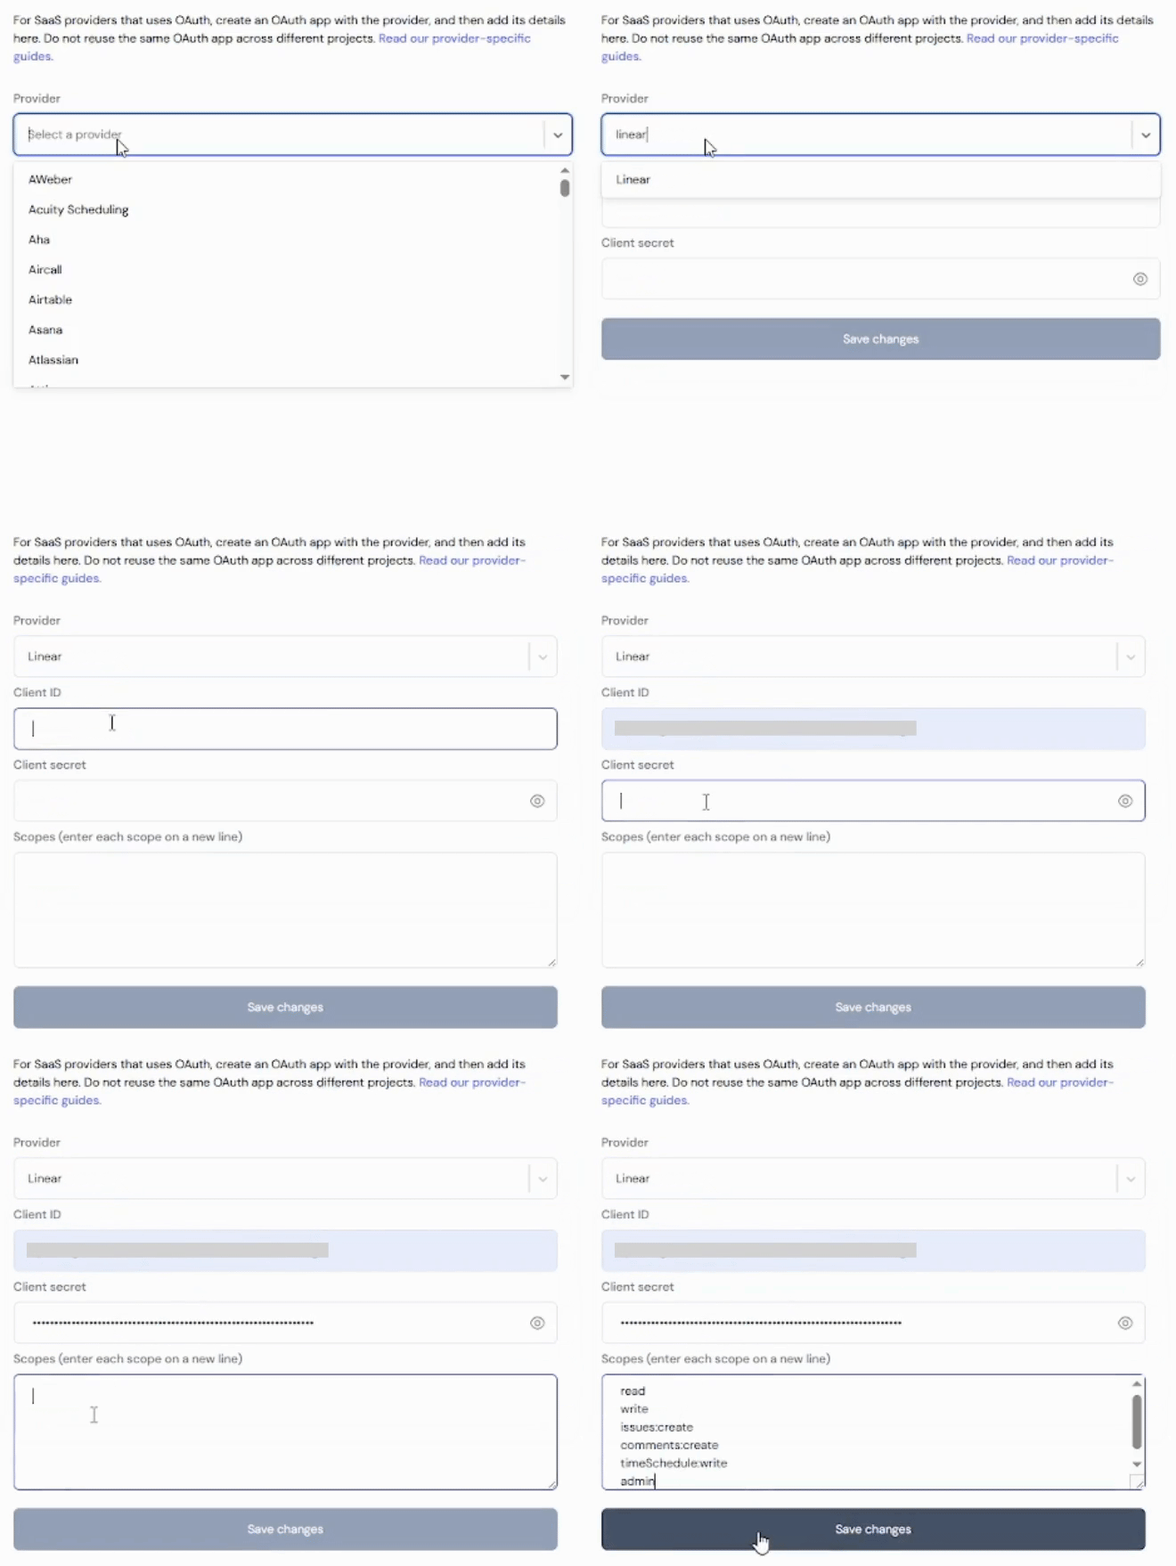
 3. Select **Provider Apps**.
4. Select Linear from the **Provider** list.
5. Enter the previously obtained Client ID in the **Client ID** field, the Client Secret in the **Client Secret** field and scopes in the **Scopes** field.
3. Select **Provider Apps**.
4. Select Linear from the **Provider** list.
5. Enter the previously obtained Client ID in the **Client ID** field, the Client Secret in the **Client Secret** field and scopes in the **Scopes** field.