> ## Documentation Index
> Fetch the complete documentation index at: https://ampersand-24eb5c1a-feat-always-enabled-object.mintlify.site/llms.txt
> Use this file to discover all available pages before exploring further.
# Zoho
## What's Supported
### Supported Actions
This connector supports:
* [Read Actions](/read-actions), including full historic backfill and incremental read.
* [Write Actions](/write-actions).
* [Proxy Actions](/proxy-actions), using the base URL `https://www.zohoapis.com`.
### Supported Objects
The Zoho connector allows you to read from and write to these objects:
* Leads
* Accounts
* Contacts
* Deals
* Campaigns
* Tasks
* Cases
* Events
* Calls
* Solutions
* Products
* Vendors
* Price
* Books
* Quotes
* Sales Orders
* Purchase Orders
* Invoices
* Appointments
* Appointments Rescheduled History
* Services
* Custom
### Example integration
For an example manifest file of a Zoho integration, visit our [samples repo on Github](https://github.com/amp-labs/samples/blob/main/zoho/amp.yaml).
## Before You Get Started
To connect *Zoho* with *Ampersand*, you will need [a Zoho Account](https://www.zoho.com/crm/).
Once your account is created, you'll need to configure an app in *Zoho* and obtain the following credentials from your app:
* Client ID
* Client Secret
* Scopes
You will use these credentials to connect your application to Ampersand.
### Create a Zoho Account
Here's how you can sign up for a **Zoho** account:
* Go to the [Zoho Sign Up page](https://www.zoho.com/crm/signup.html) and create an account.
### Creating a Zoho App
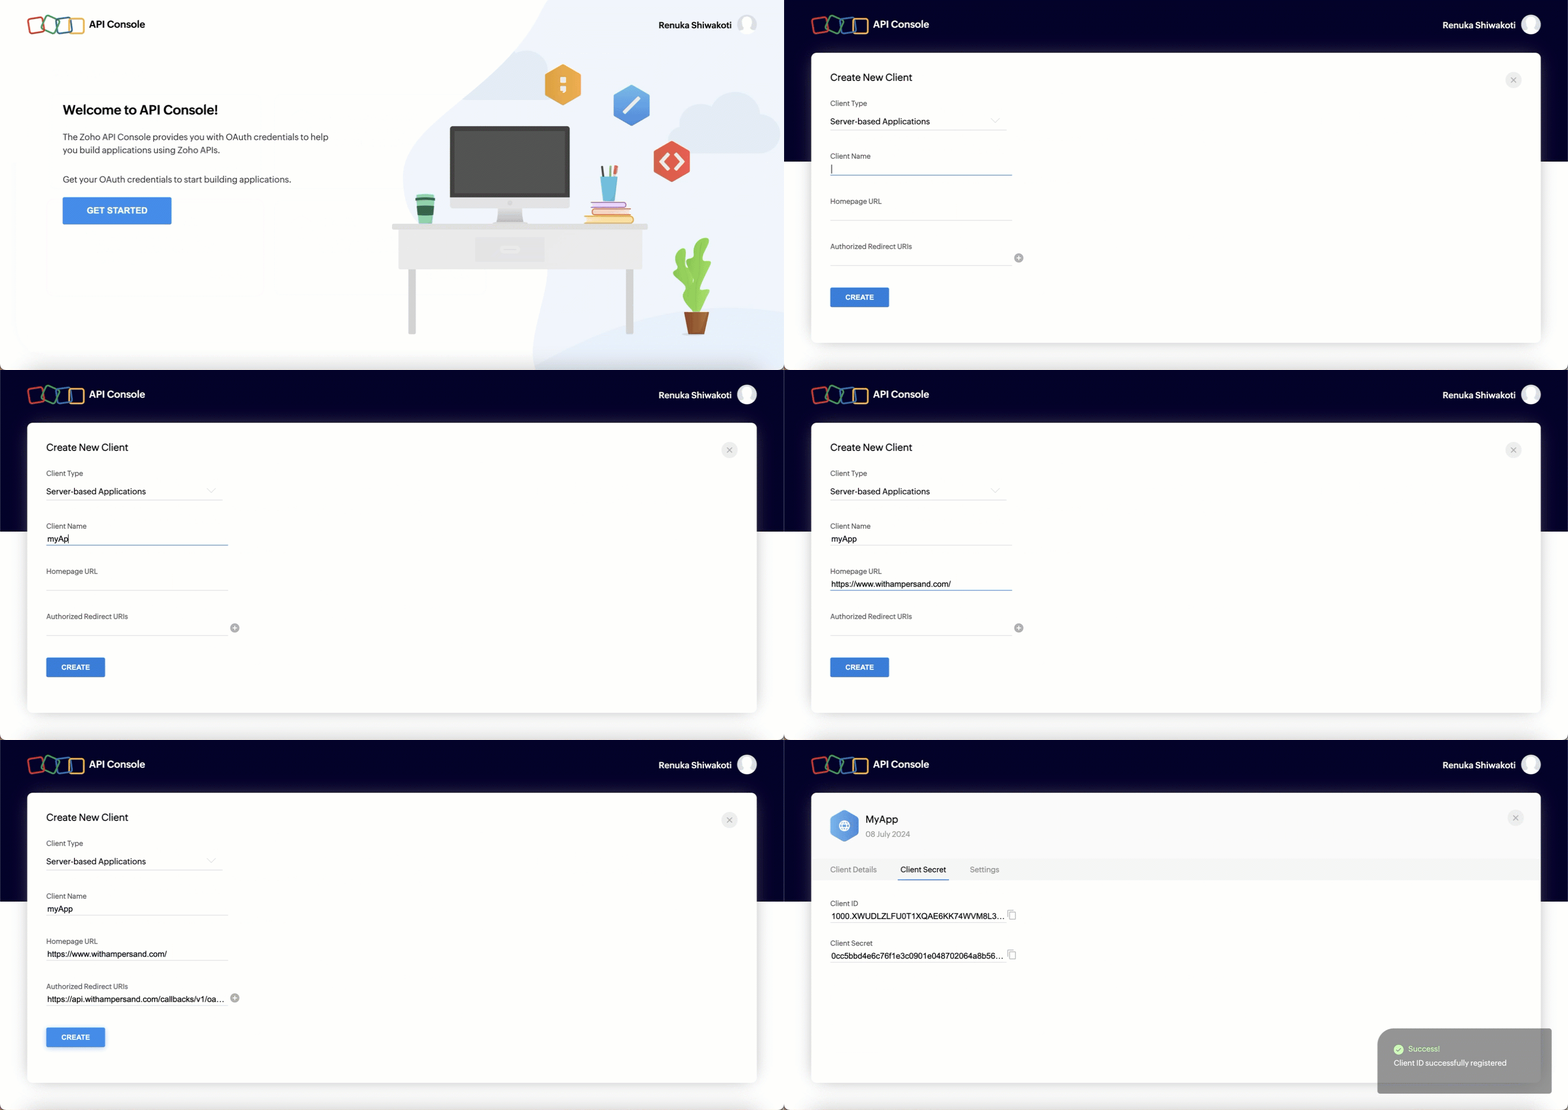
Follow the steps below to create a *Zoho* app and add the Ampersand redirect URL in the app:
1. Log in the [Zoho API Console Account](https://api-console.zoho.com/) using your Zoho account.
2. Click **Get Started** to create your first app. If you have already created an application, click **Add Client** to create a new app.
3. Select **Server-based Applications**.
4. Enter the following details:
1. **Client Name**: Name of the client app.
2. **Homepage URL**: The home page URL of your app.
3. **Authorized Redirect URIs**: The Ampersand redirect URL: `https://api.withampersand.com/callbacks/v1/oauth`.
5. Click **Create**.
You'll see the details of your newly created application. Note the **Client ID** and **Client Secret** keys as they are necessary for connecting your app to Ampersand.
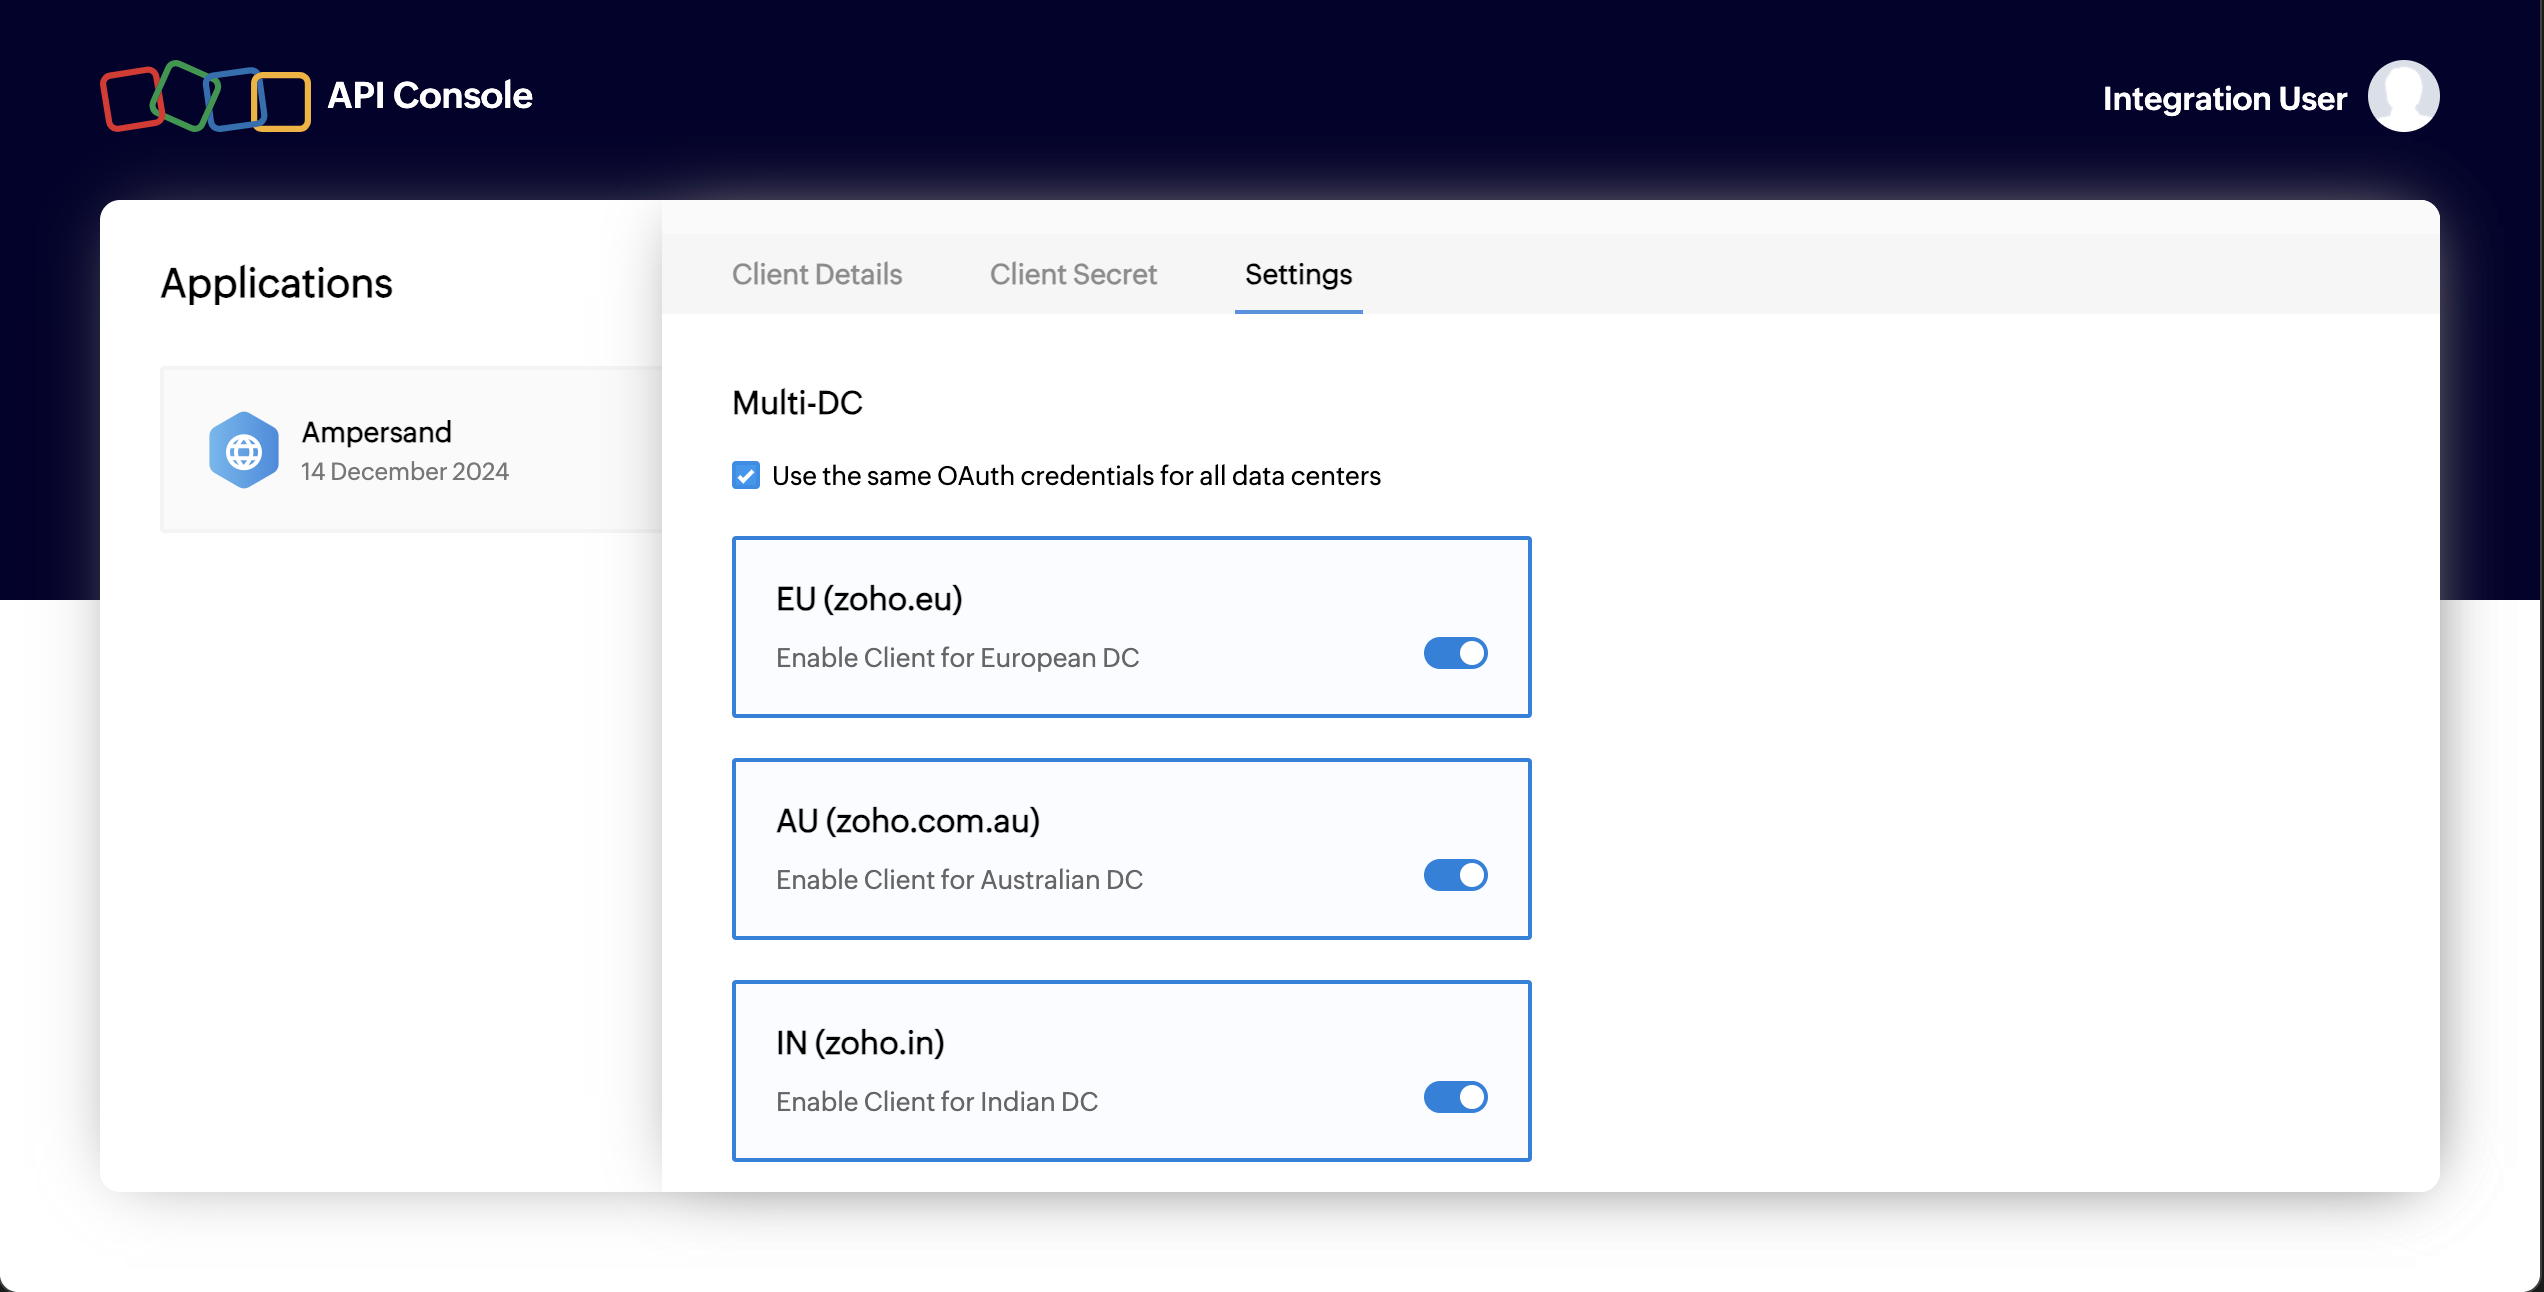
 6. Select the checkbox Use the same OAuth credentials for all data centers in the settings tab. Also toggle all regions where you expect to have customers.
 ## Add Your Zoho App Info to Ampersand
1. Log in to your [Ampersand Dashboard](https://dashboard.withampersand.com).
2. Select the project where you want to create a Zoho integration.
## Add Your Zoho App Info to Ampersand
1. Log in to your [Ampersand Dashboard](https://dashboard.withampersand.com).
2. Select the project where you want to create a Zoho integration.
 3. Select **Provider apps**.
4. Select *Zoho* from the **Provider** list.
5. Enter the previously obtained *Client ID* in the **Client ID** field and the *Client Secret* in the **Client Secret** field.
6. In the **Scopes** field, enter the list of desired scopes for your integration. We recommend the following two scopes. If you want more granular scopes, please refer to the [Zoho documentation](https://www.zoho.com/accounts/protocol/oauth/scope.html) for syntax.
```
ZohoCRM.modules.ALL
ZohoCRM.settings.ALL
```
7. Click **Save changes**.
3. Select **Provider apps**.
4. Select *Zoho* from the **Provider** list.
5. Enter the previously obtained *Client ID* in the **Client ID** field and the *Client Secret* in the **Client Secret** field.
6. In the **Scopes** field, enter the list of desired scopes for your integration. We recommend the following two scopes. If you want more granular scopes, please refer to the [Zoho documentation](https://www.zoho.com/accounts/protocol/oauth/scope.html) for syntax.
```
ZohoCRM.modules.ALL
ZohoCRM.settings.ALL
```
7. Click **Save changes**.